Writing Your Own Code
Starter Template is project-agnostic. It does not care what app you are building — it simply provides a clean and scalable structure so you can start building immediately.
Since the template follows Clean Architecture, each feature is divided into:
datadomainpresentation
If you are building a Notes app, you can convert your-feature into a notes feature and start implementing your logic.
Feature Structure
You will find the placeholder module inside:
It contains:
Rename this module to match your feature and begin development.
Refactoring (Recommended)
It is strongly recommended to properly rename your-feature.
The placeholder name has no meaning and should be replaced.
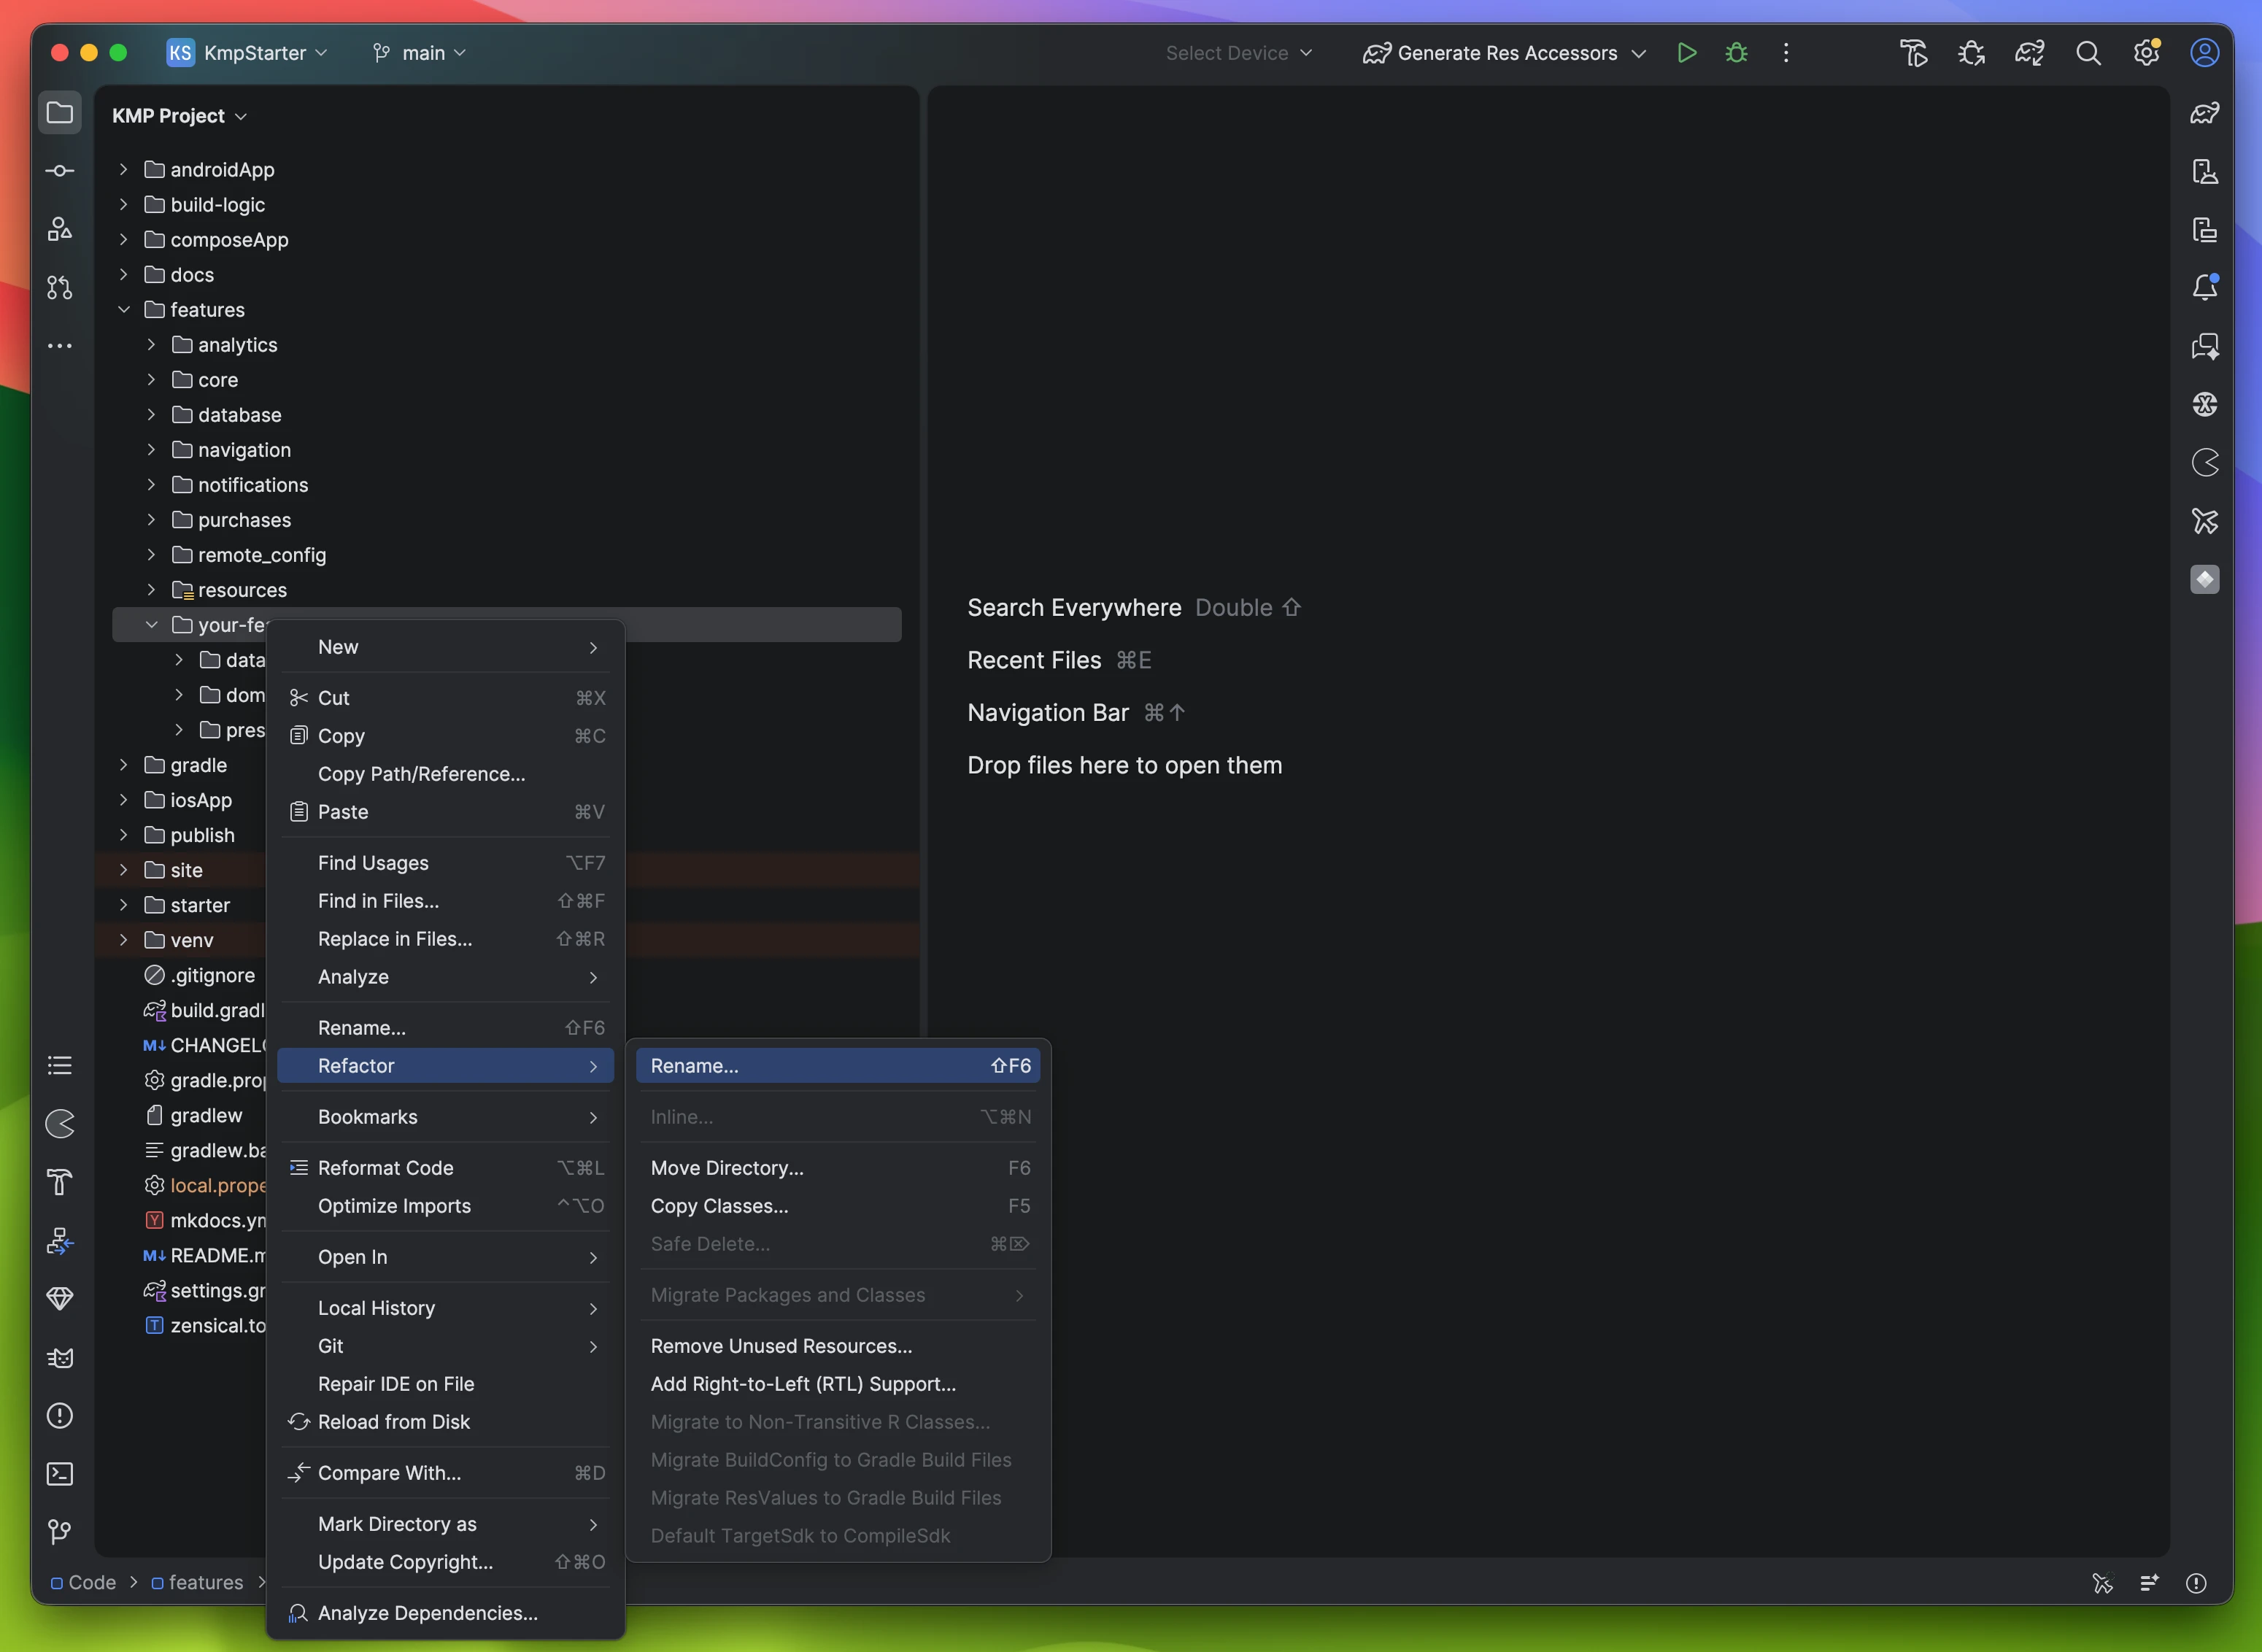
Step 0 – Rename Module
Right-click on your-feature
→ Refactor
→ Rename
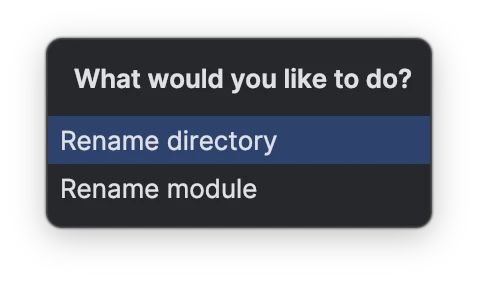
Step 1 – Rename Directory
Select Rename Directory
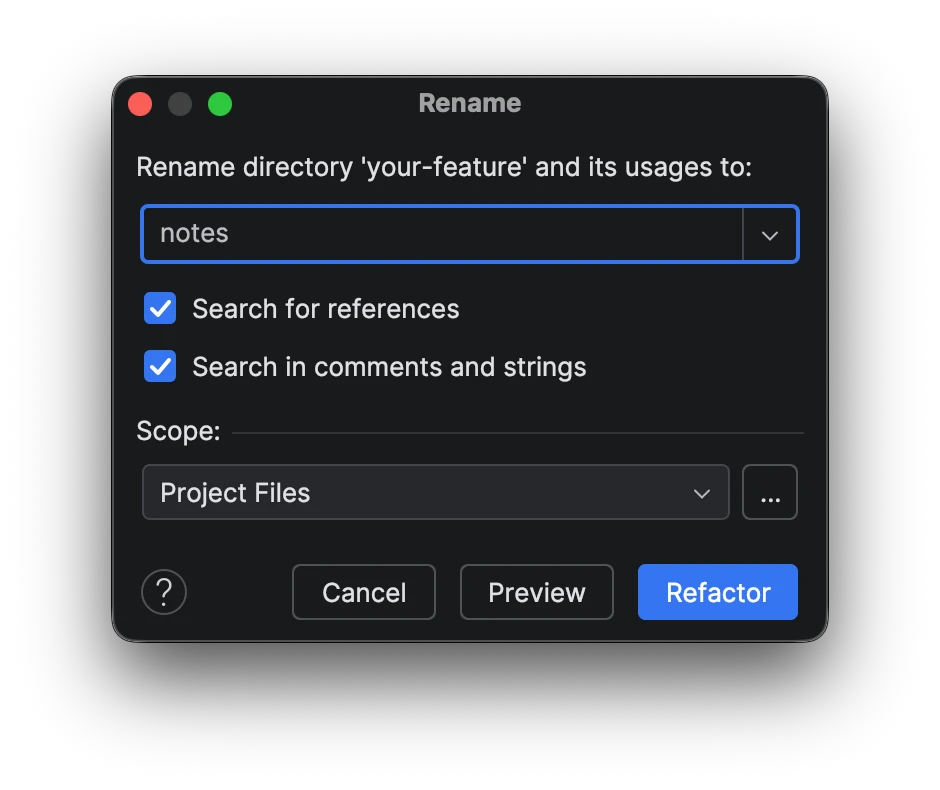
Step 2 – Enter Feature Name
Enter your feature name.
Example: notes
Step 3 – Update settings.gradle.kts
Open settings.gradle.kts in the root directory and rename module references.
Before
| settings.gradle.kts | |
|---|---|
After
| settings.gradle.kts | |
|---|---|
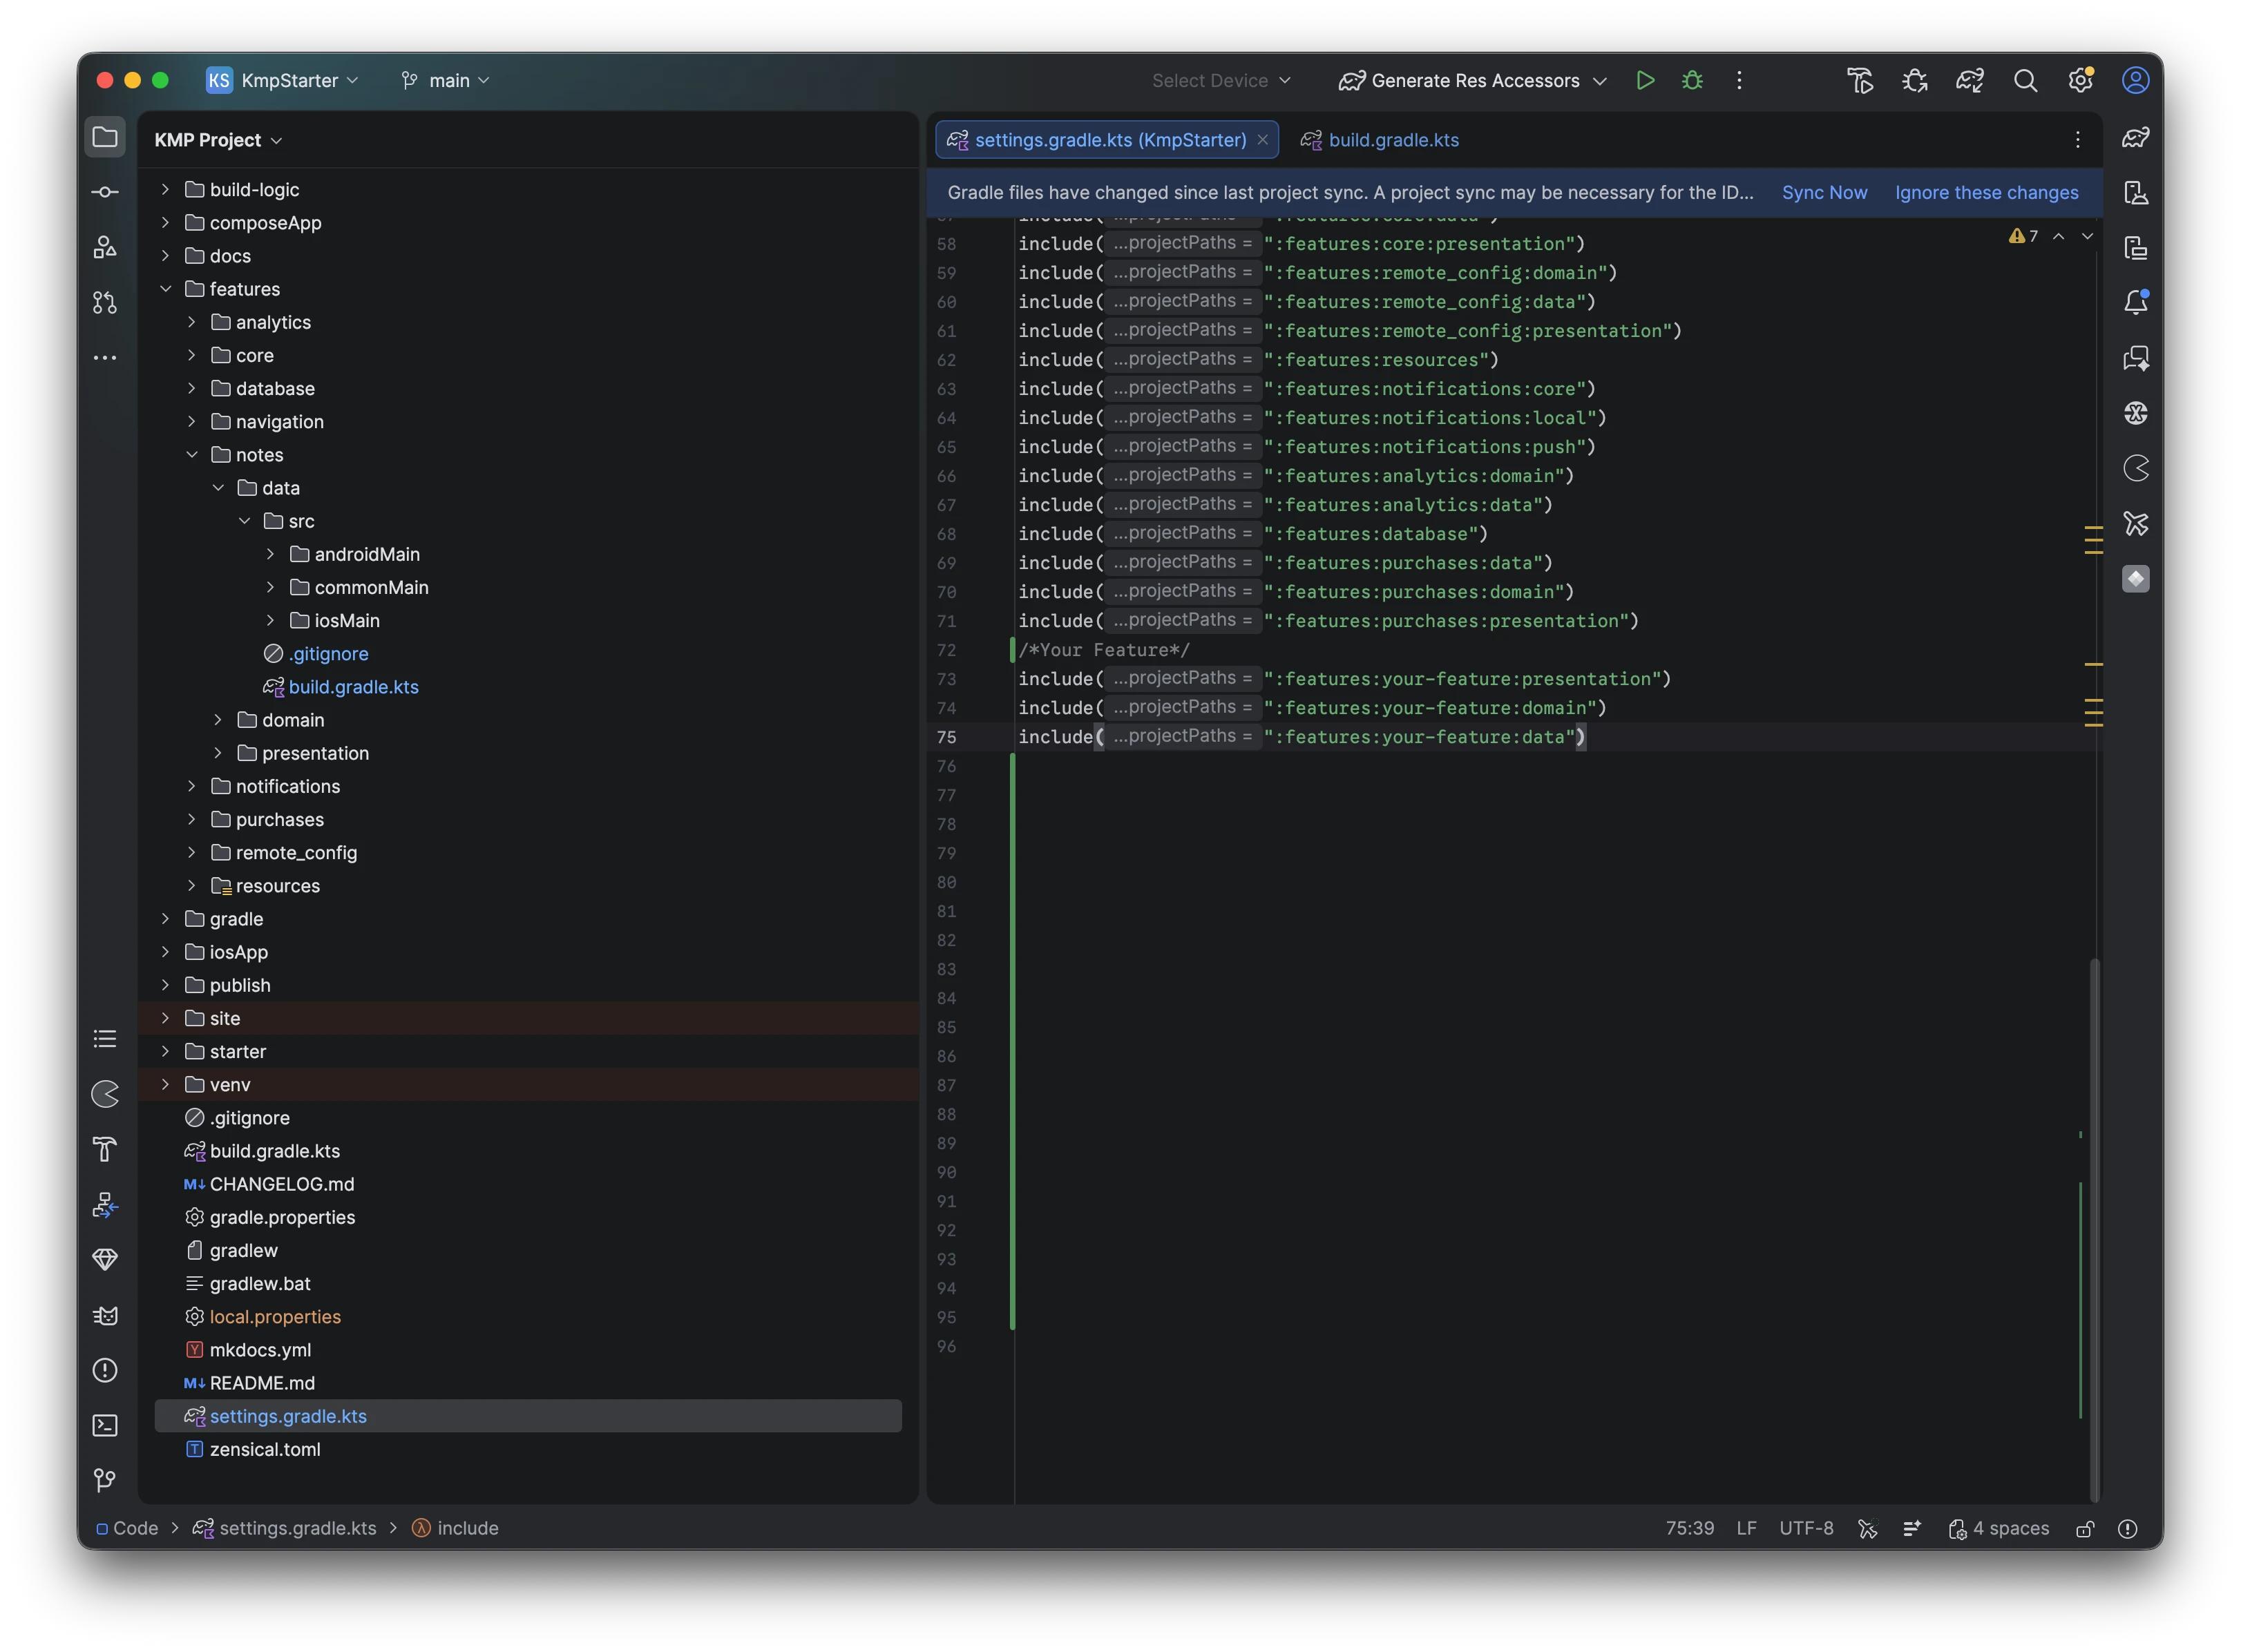
Step 4 – Rename Across Project
your-Feature is referenced by other modules using project accessors.
Rename it everywhere as shown in the screenshot:
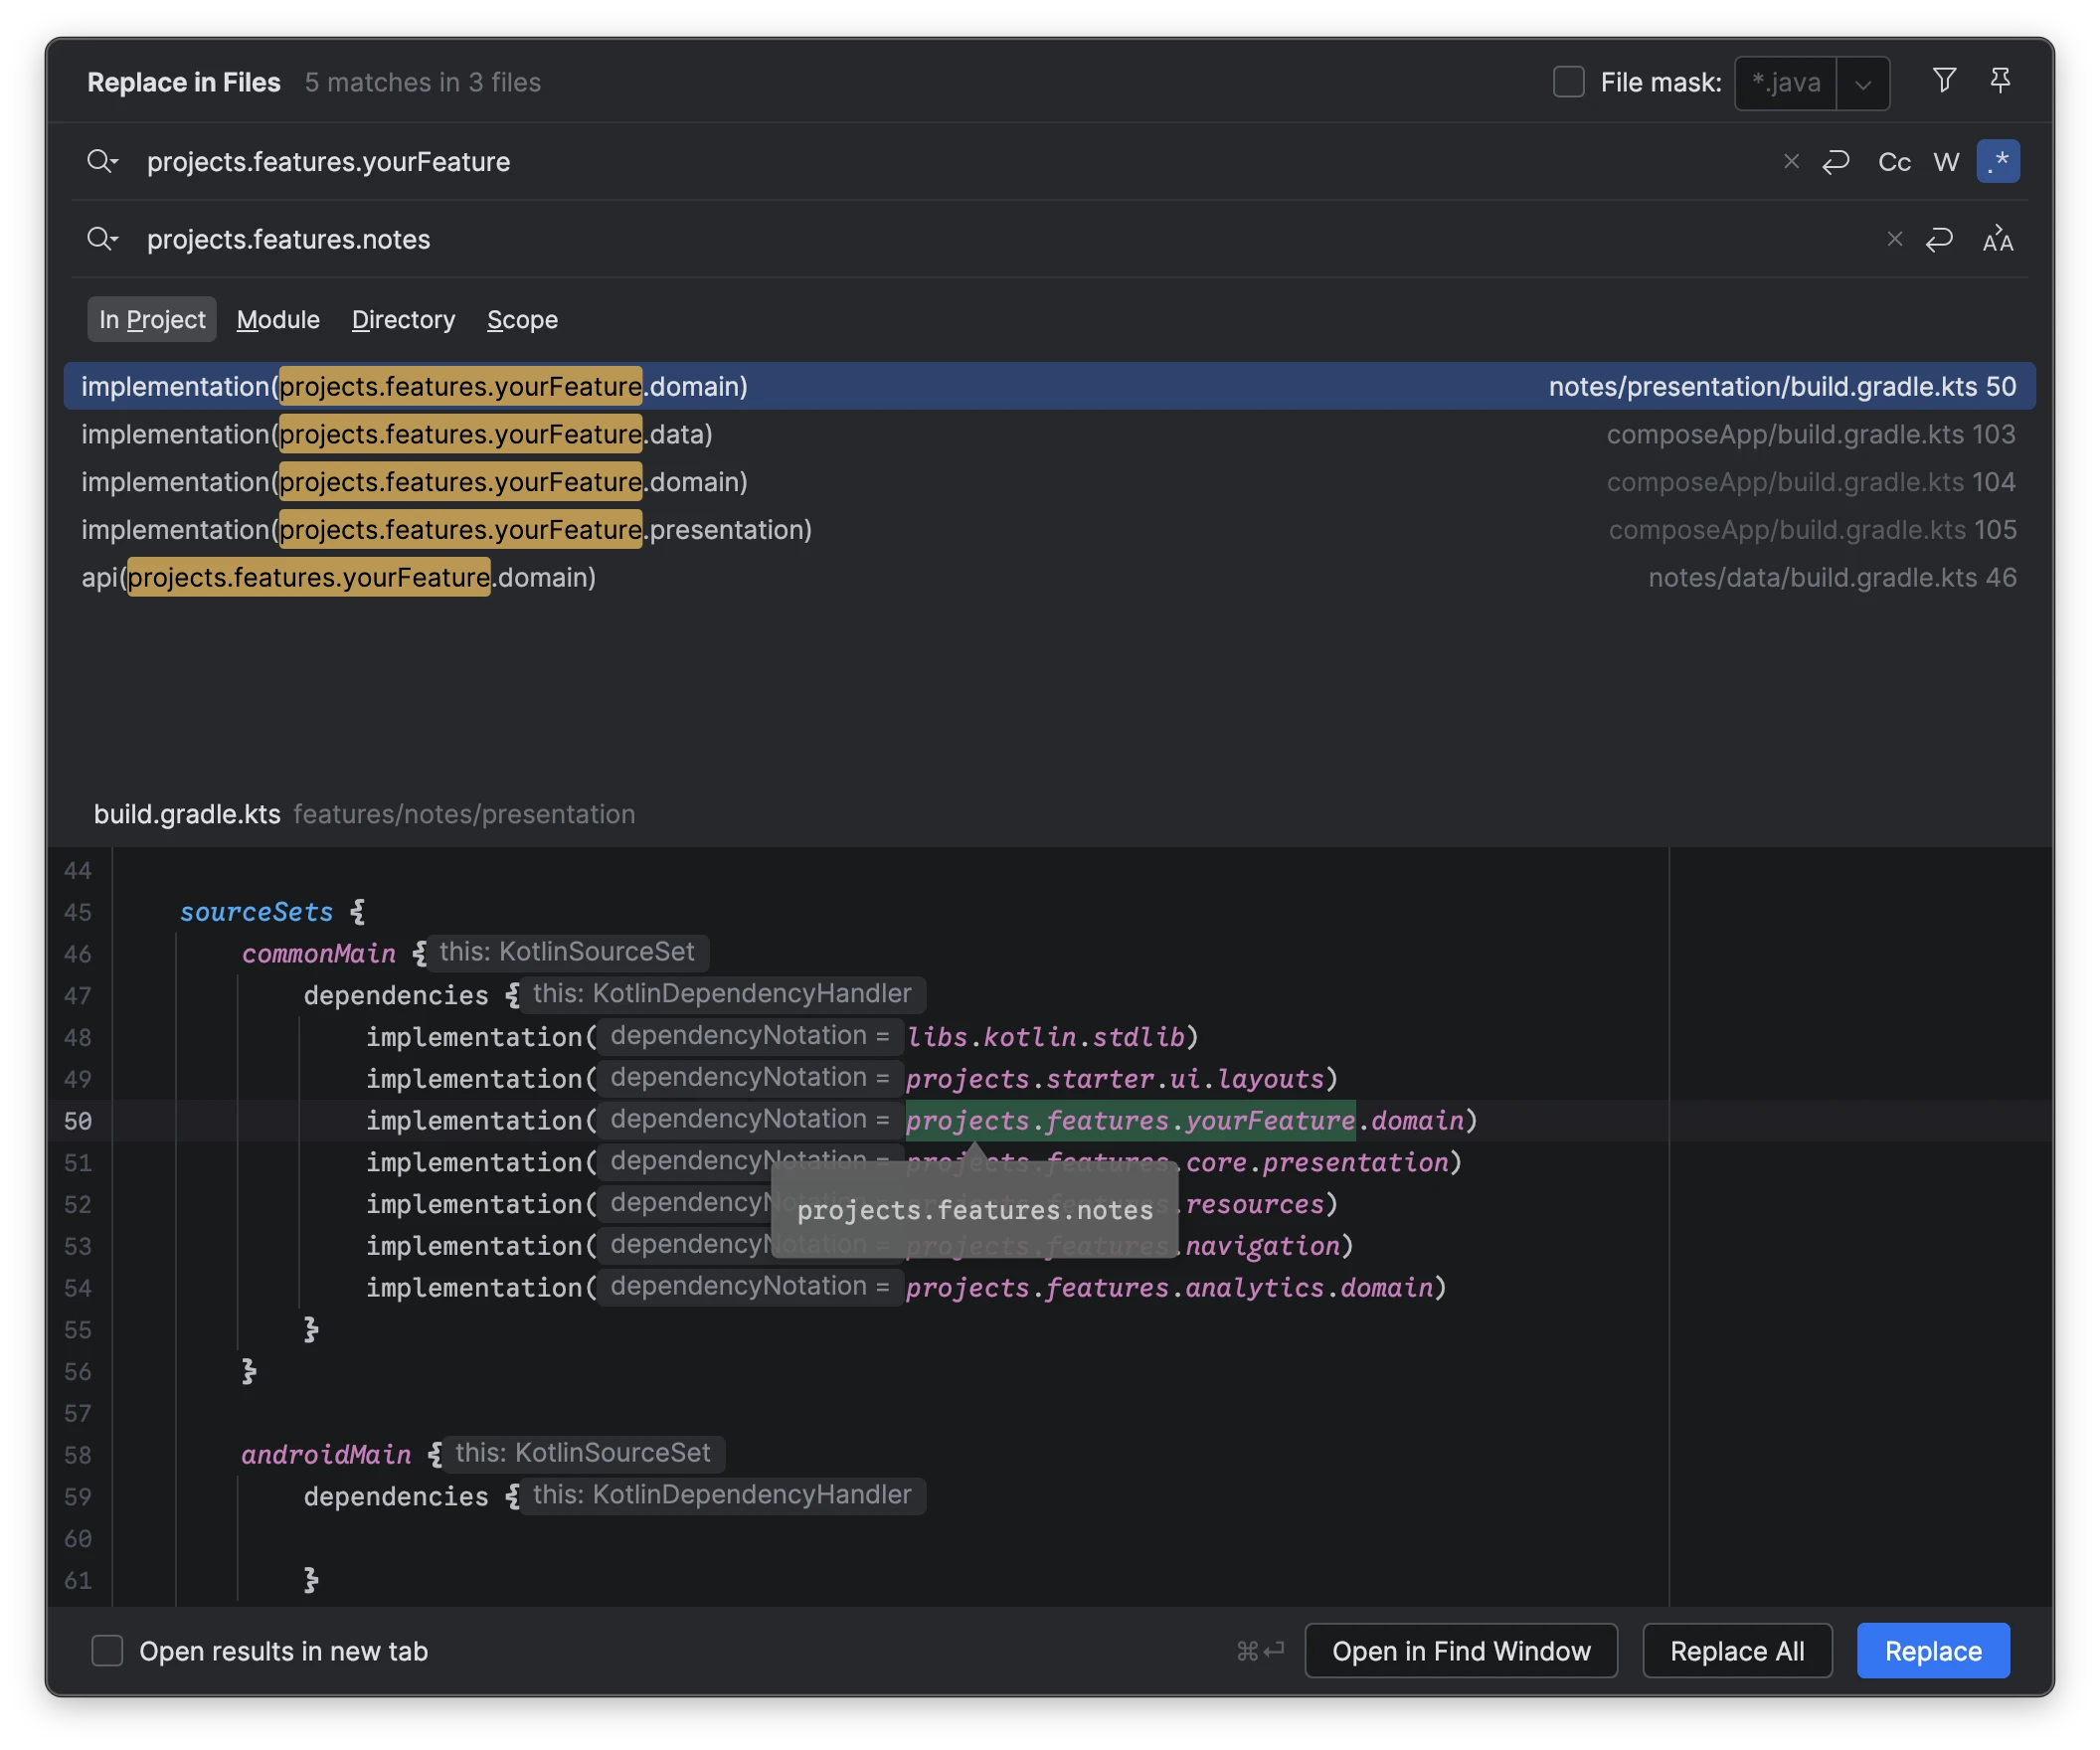
Shortcuts
- Windows: Ctrl+Shift+R
- Mac: Cmd+Shift+R
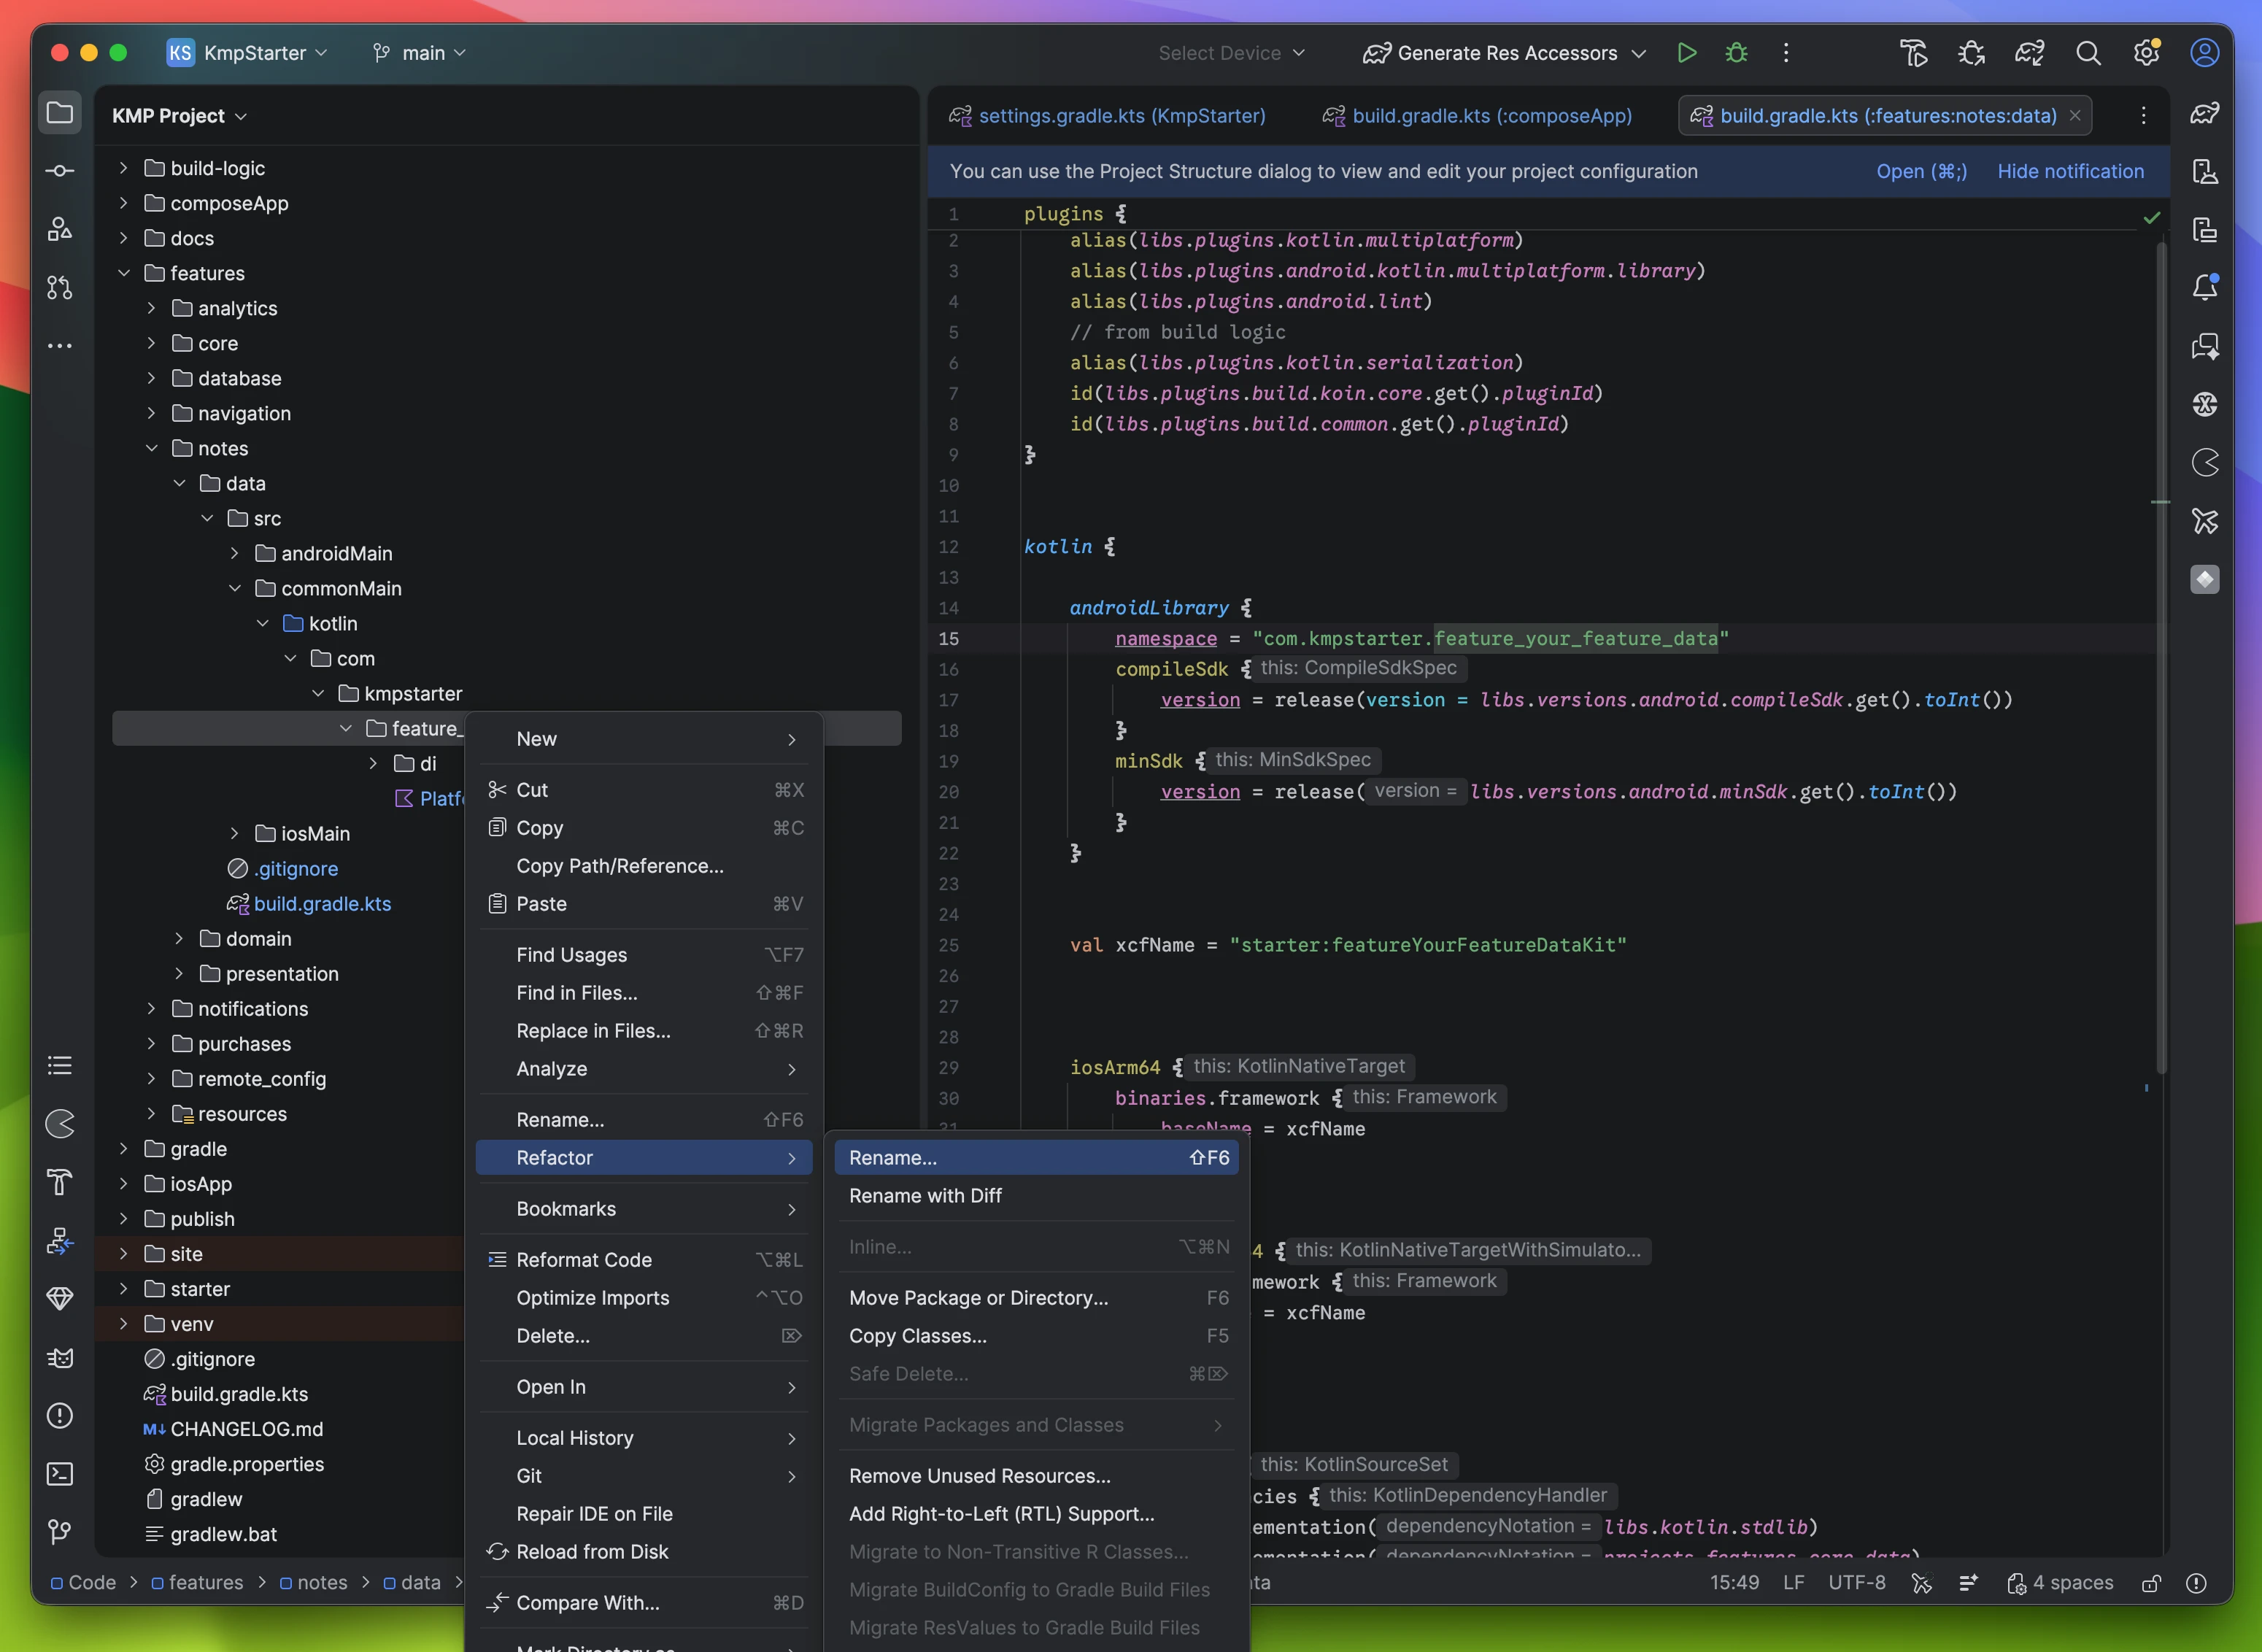
Step 5 – Rename Package (Data Layer)
Right-click:
→ Refactor
→ Rename
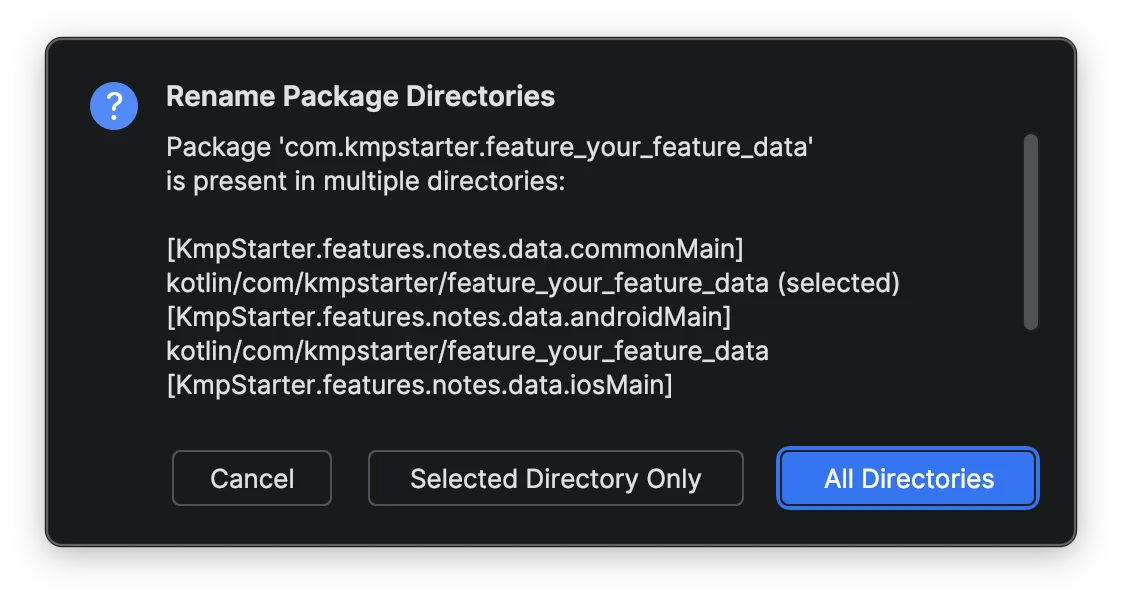
Step 6 – Select All Directories
This is important.
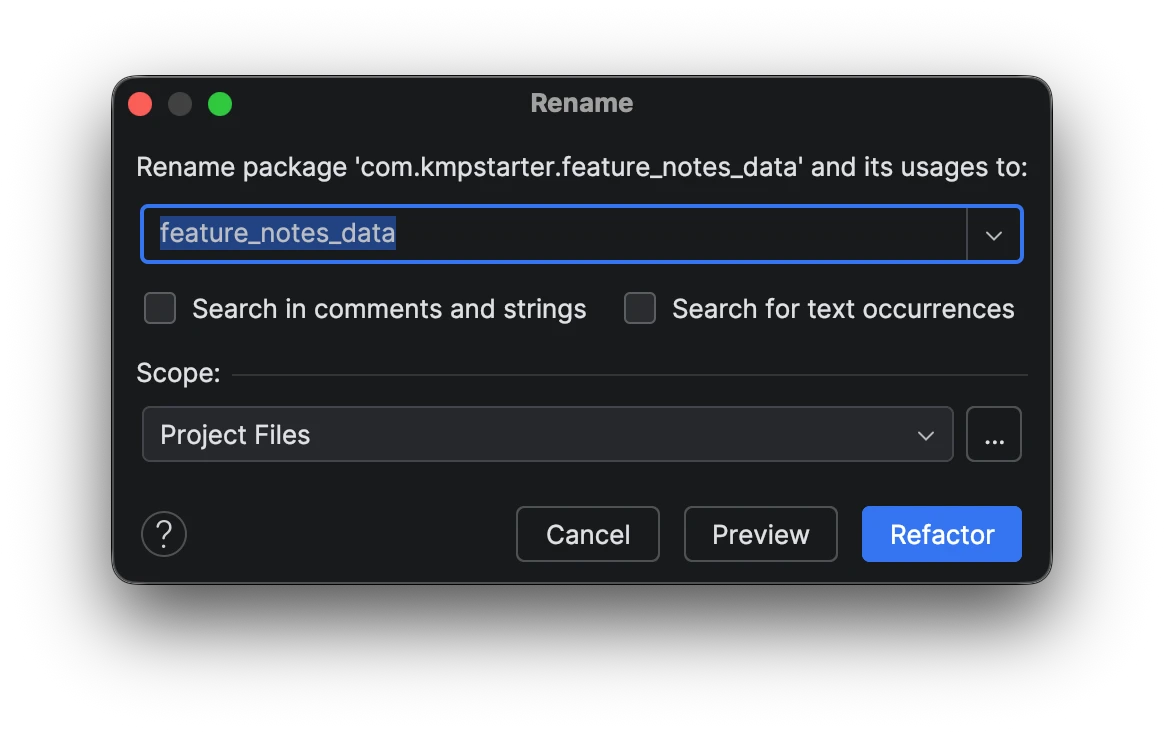
Step 7 – Enter New Package Name
Example:
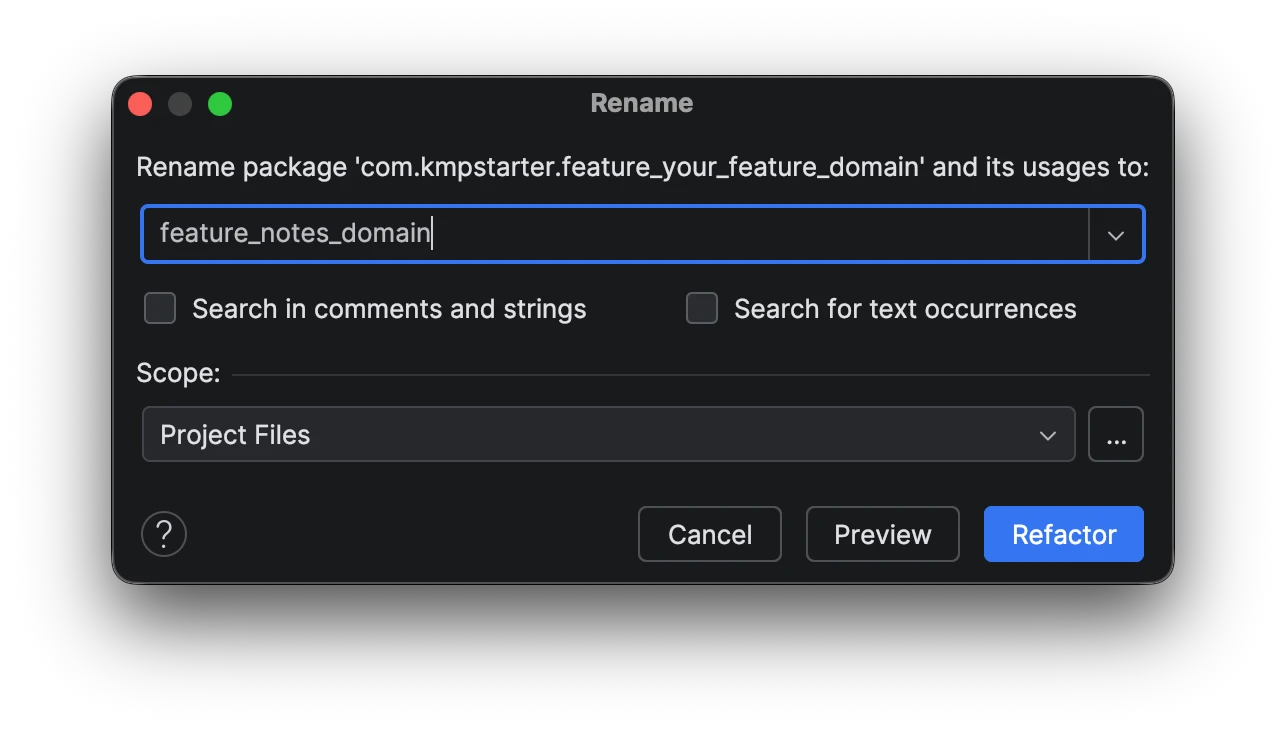
Step 8 – Rename Domain Layer
Repeat the same process for the domain layer.
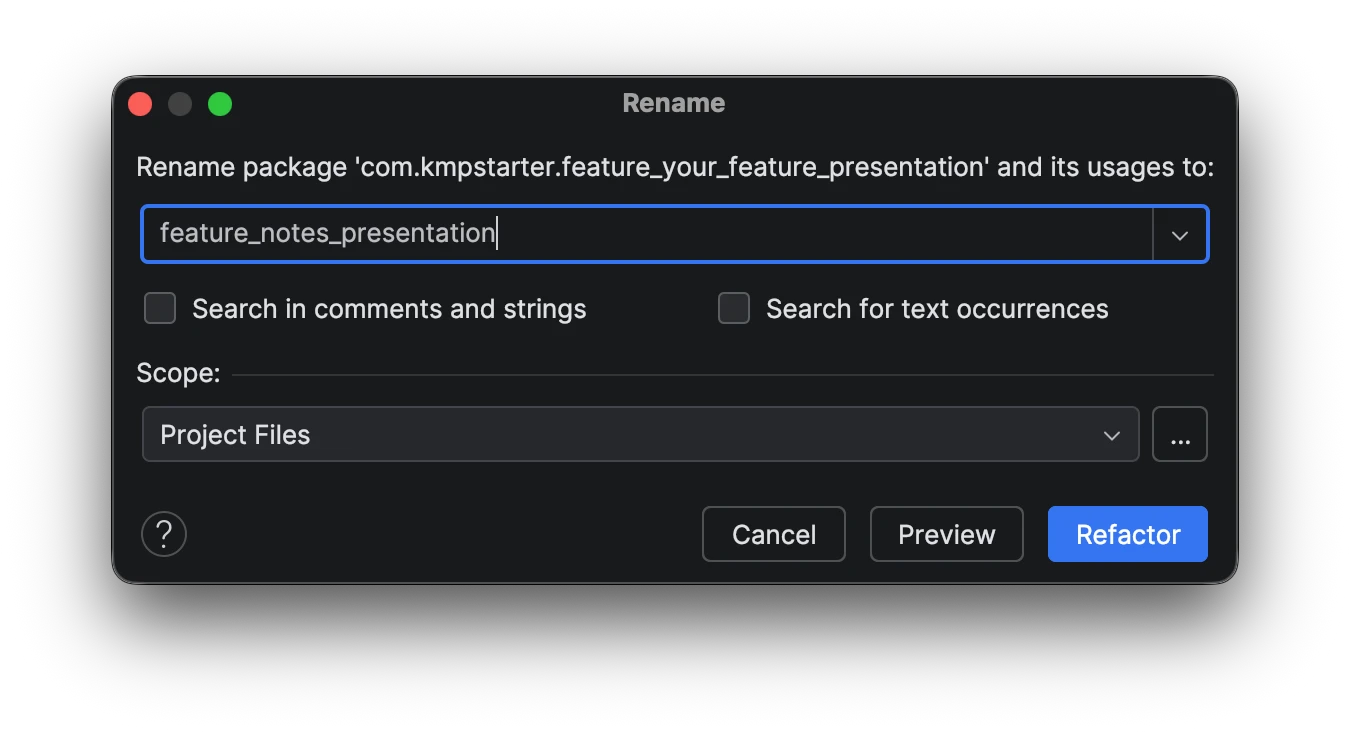
Step 9 – Rename Presentation Layer
Repeat the same process for the presentation layer.
Done
You have successfully refactored the placeholder feature.
Now you can start writing your code inside:
data→ repositories, data sourcesdomain→ use cases, modelspresentation→ UI, ViewModels, state
Follow Clean Architecture principles to keep your feature modular and scalable.
Dependency Injection
Each layer contains a di/ package for dependency injection.
You can:
- Rename the DI module to match your feature
- Add your repositories and use cases
- It is already included in
initKoin
You can replicate this structure for every new feature you build.
Defining Screen Composables
When you are making a new screen, it is best practice to divide it into two parts: a Screen Composable and a Content Composable.
1. Screen Composable
This is the "brain" of your screen. It is responsible for:
- Getting data from the
ViewModel - Handling navigation (like what happens when you click back or finish a task)
- Observing UI events (like showing a Snackbar)
- Knowing where the data is coming from (DI, Navigation parameters, etc.)
2. Content Composable
This is just for displaying the UI. It doesn't know anything about ViewModels or where the data comes from. It just takes parameters (like state) and callbacks (like onAction).
This makes it very easy to:
- Preview your screen in Android Studio
- Test the UI without worrying about logic
- Reuse the UI if needed
Example
Here is how you should structure your screen and its navigation:
@Composable
fun HomeScreen(
    viewModel: HomeViewModel = koinViewModel(),
    onTaskComplete: () -> Unit,
) {
    val state by viewModel.state.collectAsState()

    ObserveAsEvents(flow = viewModel.uiEvents) { event ->
        when (event) {
            is HomeEvents.ShowSnackbar -> SnackbarController.sendMessage(event.message)
            HomeEvents.OnTaskComplete -> onTaskComplete()
        }
    }

    HomeScreenContent(
        state = state,
        onAction = viewModel::onAction,
    )
}

@Composable
private fun HomeScreenContent(
    state: HomeState,
    onAction: (HomeActions) -> Unit,
) {
    Scaffold {
        // Build UI using state and onAction
    }
}
Now call it in your NavigationModule:
navigation<StarterScreens.Home> {
    val navigator = StarterNavigator.getCurrent()
    HomeScreen(onTaskComplete = { navigator.navigateUp() })
}
State vs Individual Parameters
Passing individual variables like username: String is fine for tiny screens, but for larger screens it's much better to just pass state and onAction.